Articulating notes on the ocarina
Articulation refers to how notes are separated in playing, similar to the spaces and punctuation used in writing. Ocarinas allow many kinds of articulation, and using them effectively can significantly enhance the sound of your playing.
Tonguing
Tonguing is a way of separating notes by stopping the airflow with the tongue. It is the standard method of articulation on all wind instruments.
The reason for using the tongue becomes evident if you try starting or stopping your breath with the diaphragm alone. Try playing some notes, separating them by puffing each one. You'll hear that this creates a 'whoop' sound, the pitch of the note ramping up and rolling off.
Thus, we split the task into two. The diaphragm controls air pressure, while the tongue regulates the flow of air, much like a tap controls the flow of water.
The most basic form of tonguing is called single tonguing, and it is done like this:
- Say 'Tu', and extend the 'u': 'Tuuuuuu...'.
- Pay attention to what your tongue is doing. Notice how the tongue initially blocks the air, and then the tip of the tongue lowers to release it.
- Now repeat this without voicing the sound.
Starting the notes is similar to 'Tuuuuuu...'. To stop, the inverse is done: raising the tip of the tongue quickly to block the airflow, like '...uuuuuuT'.
In case you have trouble getting this, the article Tongue posture and articulation walks through consciously controlling the tongue and how to put it in the correct position.


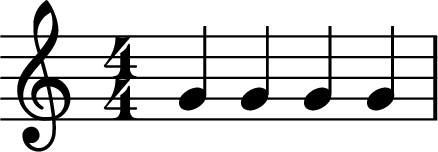
Let's practice doing some basic tonguing. Have a go with this, starting each note with a short tongued articulation.
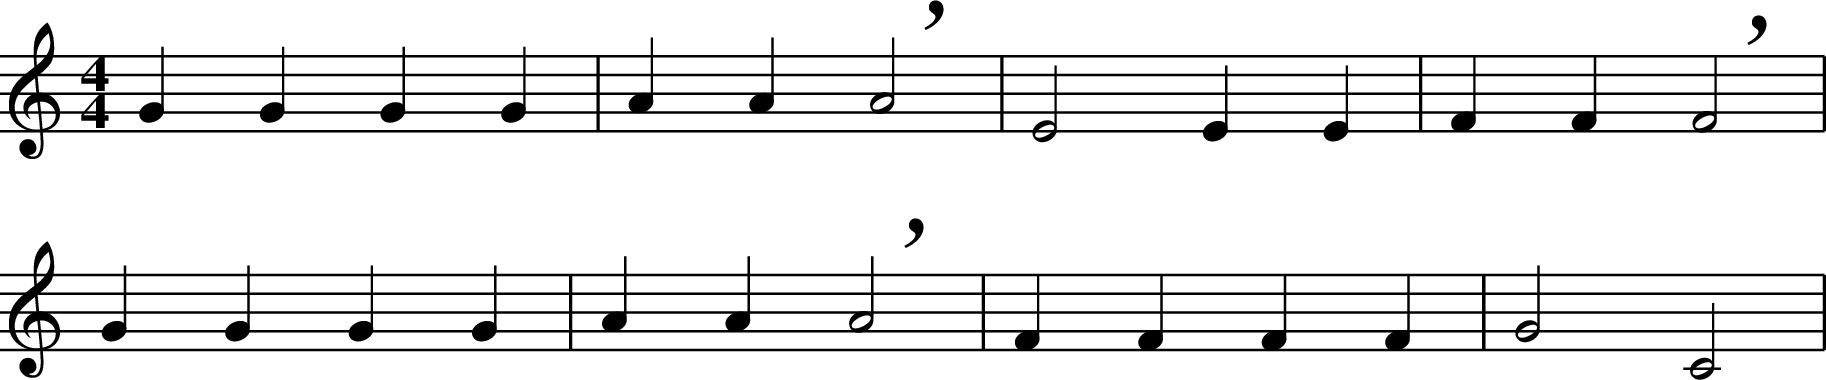
The commas above the staff are breath marks, indicating notes that can be cut short to breathe. Having notes start at the right time is far more important to the rhythm of music than exactly when a note ends. It's perfectly fine to end a note early to breathe, and better than struggling and running out of air.
Try to time your tonguing so that the notes start exactly on the beat. If you play with a metronome, perfect timing can be heard as the metronome's sound and the start of your note kind of 'blend'. The following tool demonstrates how that sounds.
Rhythmic accuracy develops naturally over time, and achieving perfection from the start is not crucial.
Coordinating your tongue and fingers
If you think about it, the act of moving from one note to another, such as from C to D, requires quite a few things to happen in a precise order:
- Stopping the air with the tongue.
- Performing any fingering and pressure changes while the note is stopped.
- Lowering the tongue to restart the air.
Maintaining this coordination is crucial, or unwanted sounds and chirps will occur. We can practice this deliberately if we first take conscious control of the tongue.
As we observed in the introduction, when saying 'tu', there is a moment where the tongue blocks the airflow. If you learn to consciously move the tongue into this position, it allows you to stop the air when you wish, for as long as you want:
- Try saying 'Tu' and notice the position of the tongue when it blocks the flow of air.
- If you put the tongue in this position deliberately and try to exhale, you'll feel pressure behind the tongue, but no air flows.
- If you also notice the position of the tongue when air is freely flowing, you can move between the two states to control the air as you wish.
Being able to stop the air for an arbitrary duration allows deliberate, slow articulation practice. Try, for instance, moving between the notes F and G on a C ocarina:
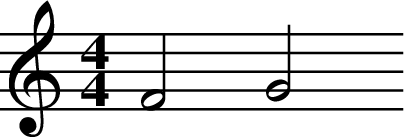
Over the duration of a few seconds:
- Start to exhale and stop the air with your tongue.
- While the air is stopped, consciously change fingering and think about the pressure needed for G.
- Lower the tongue to start playing the note.
Slow, deliberate practice trains the subconscious mind to perform the task accurately, so it responds correctly when the pace increases. This practice approach can be handy with note transitions that involve moving multiple fingers at once, such as cross fingerings and large leaps.
- Practice lifting and lowering groups of fingers, so they contact and leave the instrument at the same time.
- Practice cross-fingerings, so the alternating fingers raise and touch at the same time.
To check the sound of what you're doing at full speed, try recording yourself. It lets you hear any mistakes you may not otherwise notice.
Varying the duration of articulations
When you tongue notes, the tongue's movement can be a rapid flick, briefly blocking the air. Alternatively, it can dwell for so long that the gaps are longer than the notes themselves.
Give this a try for yourself:
- Play a selection of quarter notes to a metronome at a low tempo.
- Initially separate the notes with a brief gap, flicking the tongue to block the air, and gradually increase the space between notes.
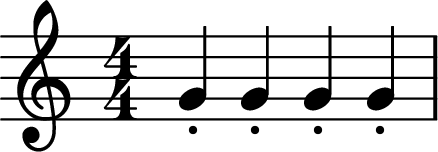
This is how a swift flick of the tongue would look if you measured it. In these diagrams, the width of the box represents the duration of the note, and the beat is shown by the timeline at the bottom.

As you keep playing notes at the same tempo, creating longer gaps between them, you'll notice that your playing sounds more detached. That's called staccato.
Note that the time of the articulation is taken from the end of the previous note. The following note should always start in time with the metronome.

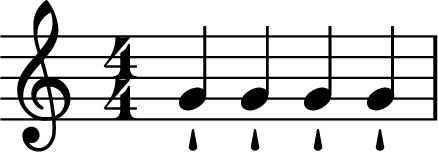
Now you can try some notes with even longer gaps, such that the gaps are longer than the notes. This is called staccatissimo.

Once you get a feel for varying the length of articulations, try changing the duration of the gaps in a single string of notes randomly. The goal is simply to become accustomed to switching between different articulation lengths.

Legato and staccato are not absolute; there is a spectrum ranging from only briefly stopping the sound to an extreme staccatissimo where the gaps between the notes are far longer than the notes themselves.
In notation, the duration of articulations is indicated by modifiers placed next to the note heads. A detached 'staccato' articulation is indicated with a dot:
And staccatissimo is indicated with a wedge:
The 'brief' tongued articulation doesn't have a name as far as I'm aware. Within the classical tradition, such an articulation is implied by notes written with no modifiers.
However, how notation is interpreted varies between musical idioms. Within Irish music, for instance, everything is assumed to be slurred (played without tonguing), and that fact isn't written in notation. Interpreting such music 'classically' will not sound right.
To practice reading the different kinds of articulation, find or create exercises making use of different symbols in notation, such as:

Varying the duration of articulations is one way to create phrasing in music, using shorter articulations within a phrase and longer ones to separate phrases.

There are numerous ways that the different articulations can be applied musically. A few more examples can be found in Ocarina articulation and ornamentation applied. I'd also suggest looking for performance guidance of the genres you're interested in, and as always, listen to skilled performances.
Slurring (legato)
Slurring or 'legato' is playing a series of notes with no articulation, creating a loose, flowing sound.
In notation, it is written with a curved line over a group of notes, like this:
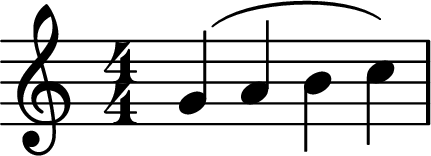
Generally, you begin and end a slur using the tongue, playing the notes in between with a continuous breath.
- Begin the first note with your tongue as you learned previously.
- Play the intermediate notes as a continuation of the same breath. Move your fingers, but do not tongue the notes.
- End the final note cleanly using your tongue.
Slurs basically mean that you're playing a different rhythm with your tongue and your fingers. If you consider this notation:

Your fingers will be following the rhythm as written, but your tongue will be doing this, where only the first note in each of the slurred groups is tongued:

Slurring only articulates notes because their pitch is different. The effect of a slur over a group of notes of the same pitch is to join them into a single long note.
I'd recommend getting yourself some blank manuscript paper and making some slurring exercises featuring slurs in different places and in various time signatures.
Once you've got the hang of that, give this a try:
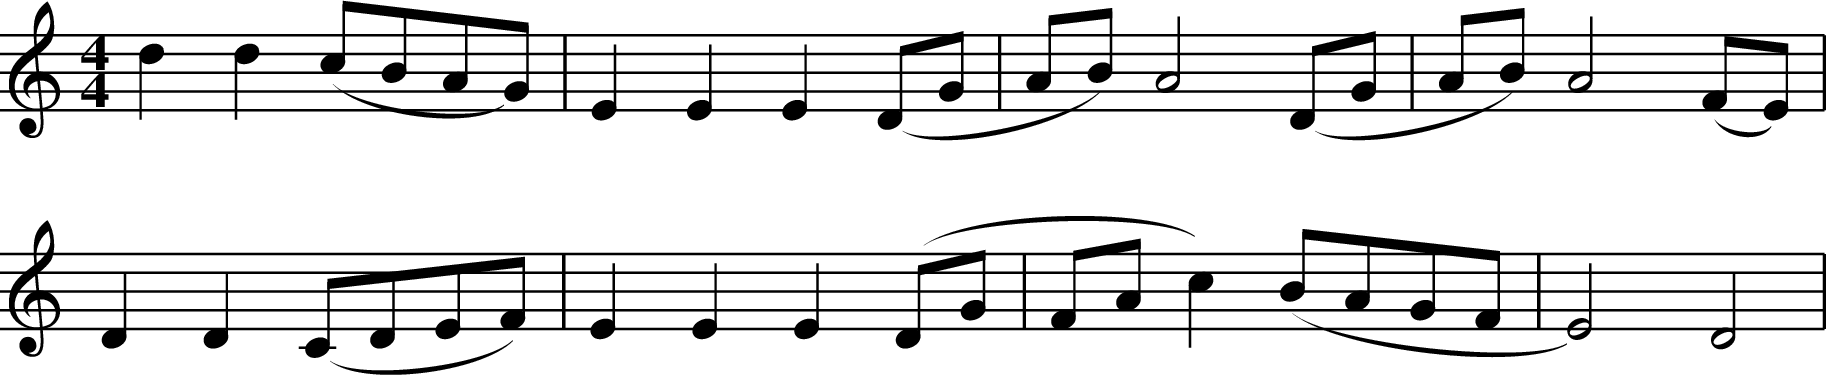
Synchronising the movement of your fingers with your breath is of exceptional importance when slurring notes, as you cannot hide mistakes behind tonguing:
- Keeping the instrument in tune requires raising or lowering your breath exactly in time with your finger movement.
- Any time that two or more fingers move, they must move at precisely the same time.
Those things can be improved through slow practice, as noted previously.
Fingered articulations
Fingered articulations allow you to separate notes without interrupting the airflow into the instrument. They involve sounding a higher or lower pitch for such a short time that it's perceived as a percussive blip or click, instead of a note in its own right.
Fingered articulations created using a higher pitch are called 'cuts', and ones produced with a lower pitch are called 'strikes'. To get an idea of how fingered articulations work in practice, let's have a go at playing some strikes on G (assuming a C ocarina):
- Finger a G and blow it at normal pressure as if playing a long tone.
- Lift the right index finger somewhat higher than standard playing position.
- Energetically drive the finger down towards its hole.
- If you completely relax the finger just before it contacts the instrument, it will bounce off, producing a very short blip.
You'll notice that you've produced a series of audibly distinct notes, yet you haven't changed the airflow into the instrument.
Extensive use of fingered articulations produces a 'flowing' sound, as is characteristic of Irish flute and whistle playing. They are discussed in detail in Playing cuts and strikes on the ocarina.
Double and triple tonguing
Double tonguing allows you to articulate notes faster than single tonguing, and is done by articulating with the front and back of the tongue alternately. Using a vocal analogy, its similar to 'tu - ku - tu - ku ...'.


To get started with double tonguing, I'd recommend practising articulating 4/4 quarter notes at a relatively low tempo like 100 bpm:
- Articulate a sequence of notes on the beat, alternating between the front (tu) and back (ku) of the tongue.
- Aim to make the duration of the two articulations equal.
- Minimise the time spent moving from the two blocking positions to 'air flowing'.
- Aim to keep your tongue static during the 'open' period so the air can flow easily.
At high tempo, it's easy to have the tongue too high, resulting in a noisy tone and potentially restricting airflow enough to make the high notes flat. However, low-tempo practice allows you to really exaggerate the 'air flowing' state, which helps you keep the articulation clean even when you speed it up.
Regarding higher tempos, let's give that a try. Have a go at playing some eighth notes using double tonguing:

Then 16th notes at a similar tempo:

And to uneven rhythms:

Double tonguing is typically used to articulate rapid sequences, in conjunction with single tonguing to articulate longer notes. It's worth spending some time practising switching between them.
Articulate the quarter notes in the notation below with single tonguing, and the 16ths with double tonguing:

Of course, longer/shorter is relative to the tempo and absolute duration of notes in real time, not the written note durations. So do whatever feels natural for the music you're playing.
Triple tonguing
Triple tonguing is a slight variation on double tonguing where a 3rd articulation is added to the sequence. Using a vocal analogy, it's like 'tu, ku, du, tu, ku, du ...', with the 'du' syllable having the tongue a little farther back than 'tu'.
Triple tonguing helps you play sections of music grouped into multiples of three, like triplets and music in compound time signatures like 6/8. Otherwise, it's the same as double tonguing.

Varying the attack of notes
When you tongue notes, there is an initial pulse of air pressure that gives an 'attack', a moment when the sound quality is different from what you get with steady blowing. Quite a few kinds of attack can be created using single tonguing by varying the position of your tongue:
- 'T', closer to the front of the mouth, creates a more pronounced articulation with a distinct starting pulse of air.
- 'D', with the tongue a little farther back, creates a softer articulation.
- 'Ch', creating an airy sound at the start of the note.


An even softer articulation may be created with a tongue position similar to 'L', restricting the airflow without entirely stopping it.

A different kind of attack can also be created by articulating notes using the glottis instead of the tongue. The glottis is the 'lid' that closes in your throat if you hold and release your breath with your mouth fully open.
Articulating with the glottis is called 'throating', and the working principle is the same as that of articulation created with the tongue. Using the glottis to create articulation is quite rare because the effect it produces can be excessive.
Different kinds of attack can be used to emphasise and de-emphasise notes in the same sense as varying the duration of the articulation. However, the sound of these articulations varies between ocarinas, as well as in different parts of a single instrument's range. You may notice, for instance, that the initial pulse of air from 't' can cause the instrument to screech for a fraction of a second, giving the note a percussive attack.
I'd suggest recording yourself playing all of the described attack variations on all of your ocarinas to learn how they sound on your own instruments. Then listen to performances and experiment with articulations to find places where they sound appropriate.
Closing notes
Ocarinas can perform many kinds of articulation, and making effective use of these can significantly improve the sound of your playing. However, there's no need to master all of them at once. I'd recommend getting the hang of basic single tonguing first, and then experiment with the others as you wish.
