Ornamentation: vibrato, slides, and note shaping on the ocarina
Ornaments are decorations which you can add to your music to add interest and emphasise notes. They can be thought of as akin to spices, adding an aural 'flavour' to the music.
It is possible to perform many different kinds of ornament on an ocarina. As usual, they will be explained assuming C fingerings, but they work equally on ocarinas in any key.
Vibrato
One of the easiest ornaments to get started with is vibrato, a simple wavering of pitch commonly used to ornament long notes.

Vibrato is created by slightly wavering your blowing pressure. Let's lean to perform it by first revisiting how to exhale at different rates:
- Place one of your hands on your belly and the other on your ribs. Take a few breaths, feeling your belly moving in and out and your shoulders remaining stationary.
- Next, take a deep inhalation from the diaphragm, form an aperture between your lips as if saying 'boo', and exhale as rapidly as you can. If you pay attention to your chest, it will feel similar to saying 'Ha'.
- Secondly, breathe in as before, but this time hum or place your tongue behind your teeth and make a 'tss' sound, noticing that you're exhaling much more slowly.
Now let's use this to create vibrato:
- First, form a lip aperture as discussed and start blowing at a low pressure. Smoothly ramp up until you're blowing as hard as you can, then ramp back down to a slow rate.
- Blow at a steady rate and rhythmically raise/lower your breath pressure by a little.
- Now just grab your ocarina, finger any note, and repeat the same breathing; you'll find that you're playing a slow vibrato.
With regular practice, it will become automatic, allowing you to speed it up without trouble.
Refining your vibrato
Good vibrato should be uniform both in its rhythm (the time between each pulse) and in the amount of pitch variation. It's easy to develop by practising with a metronome:
- Set a metronome to a tempo between 40 and 60 BPM.
- Choose a note in the middle of the range and start playing a long tone.
- Start varying your pressure to produce vibrato, aligning the peak or trough of the oscillation with the click.
The pitch change should not be excessive; a fluctuation of 10 to 20 cents on a tuner is a good starting point. Try to keep your vibrato so that the pitch bends sharp and flat around the fingered note by the same amount.

Once you've got the hang of practising one pulse per click, try gradually working up the tempo. As the tempo increases, you may want to reduce the depth of your vibrato.
Also, it can be helpful to practice vibrato as a triplet (three waves per click) and gradually increase the tempo. I picked up this technique from a flute teacher, and it can help to make your vibrato sound more organic.

Another way to develop vibrato consistency is to practice with an audio reference of even vibrato. Listen to the differences between what you're doing vs. what you're hearing and aim to eliminate them.
It's pretty easy to synthesise such a reference using a modular synthesiser, which you can find as web apps for free. NoiseCraft is one of them, for instance. The basic idea is to create an oscillator at the pitch of the note you want and modulate its frequency with a low frequency oscillator.

Applying vibrato
As noted, the most common use for vibrato is to ornament long notes, and I'd recommend looking through the music you play, finding some slower songs with long notes, and trying to introduce vibrato onto them.
In doing this, you may notice that to make a vibrato that sounds even requires a much larger change in pressure on the high notes than on the low ones.
It's worth spending some time practising vibrato across the instrument's range, aiming to keep the pitch change consistent.
Other things to be aware of
There are several ways to vary vibrato to create different musical effects. It can vary in both depth and the rate of pitch changes.

Once playing vibrato feels natural to you, you may want to experiment with these things to see what musical effect they have. It's even possible to vary them over the duration of a note:
- You could start slow and speed up or start shallow and increase the magnitude.
- Or the inverse, starting rapidly or deep and gradually tapering off.
- Or it could vary over the duration, such as starting slow, speeding up, and slowing again.
These techniques are pretty standard in the playing of the flute and similar instruments, and studying some performances would be a good idea.
Slides (Glissandi)
A slide or 'glissando' is a smooth pitch change between two notes, as opposed to the normal sudden 'stair step' transition.
Slides are an effective way to create emphasis when used sympathetically with the music's style. Do note, however, that unless you have a deliberate reason to do otherwise, a slide should always go to and from a definite note. They are not an excuse for sloppy intonation.
Ocarinas can play two distinct kinds of slide: finger slides and breath slides. Finger slides are more versatile, and breath slides will be addressed a bit later in the article.
Finger slides
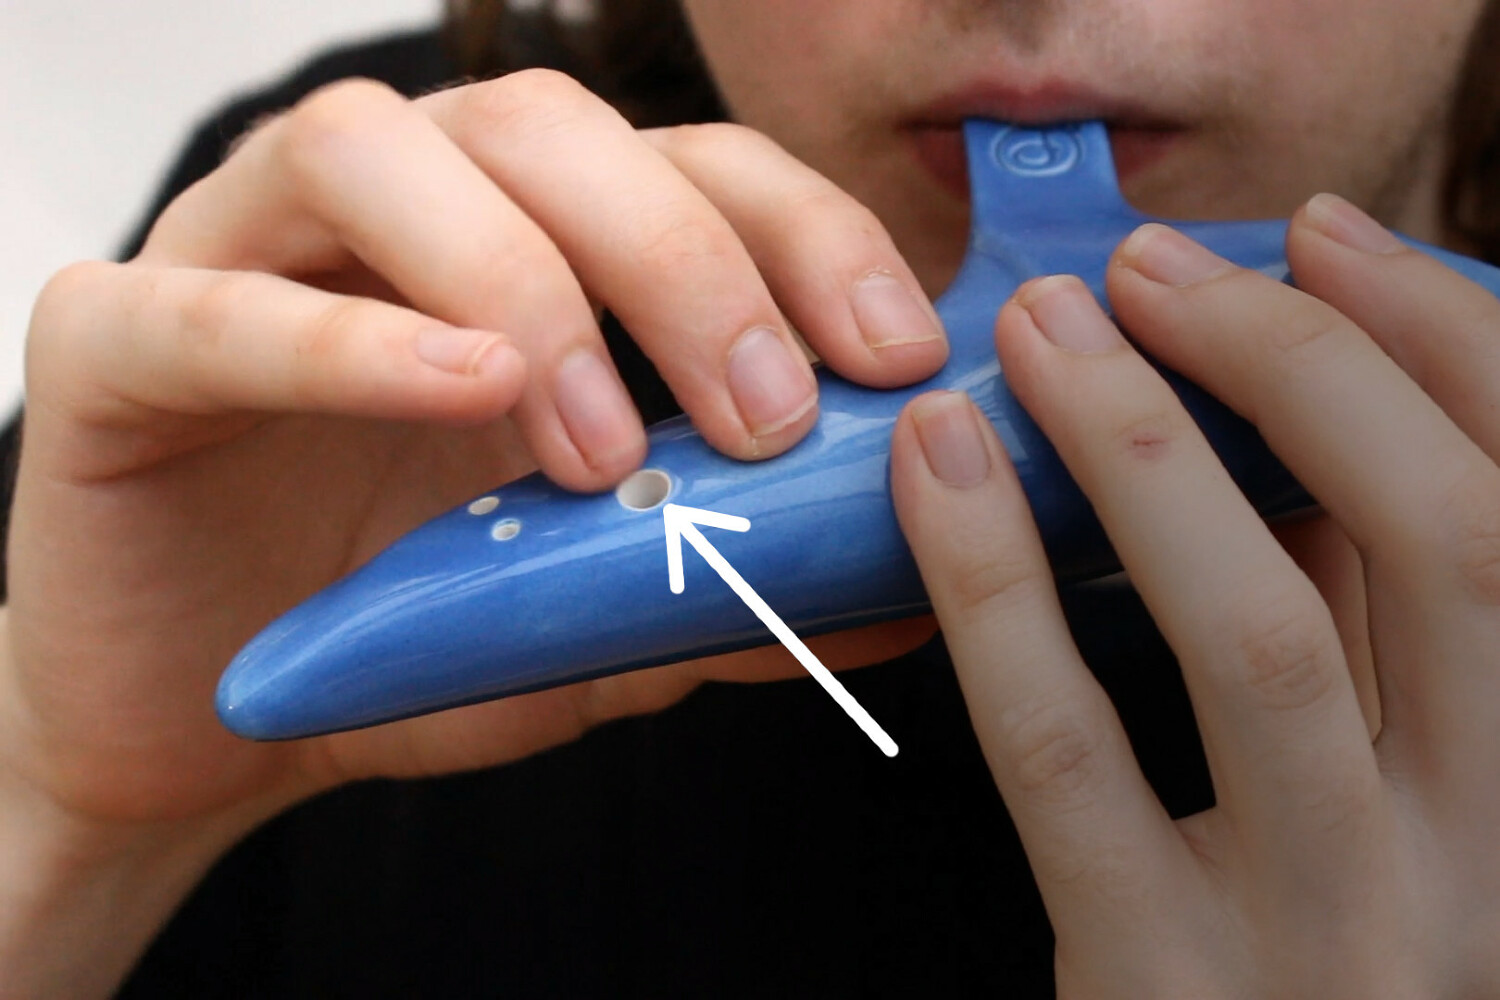
The easiest kind of finger slide is between two adjacent notes. You slur them in a single breath and move between them by sliding a finger onto or off of a hole. For instance:
- Finger D.
- Slide the E finger backwards off the hole.
- At the same time, raise your pressure a little to correct the pitch.
And you've played an ascending slide from D to E.

In sheet music, the standard way of notating a slide is to draw a straight line between the heads of two notes, like this:
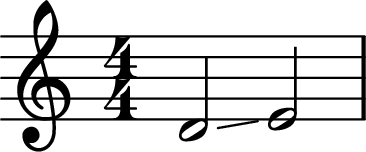
However, there are many ways this could be played, regarding the rhythmic timing of the slide and the length of the slide relative to the two notes being slid between. For example, a slide between two quarter notes could:
- Start during the first note and end in time with the start of the second (left).
- Start at the beginning of the second note and end during it (middle).
- Start during the first note and end during the second (right).
These variations are visualised below with graphical notation. The dark-coloured dashed lines are one beat apart, and the red line shows pitch over time.

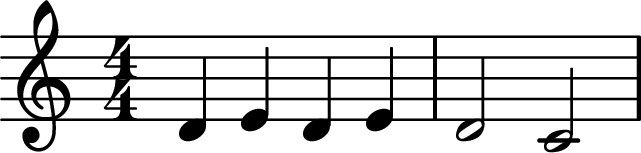
To practice these, you might find it helpful to track the subdivisions as shown above with a metronome. For example, to play the first one:
- Put on a metronome and treat each click as an eighth subdivision.
- Play a stable G note during the first click.
- Over the second click, play an ascending slide from G to A.
- Play A for the third and fourth click at a stable pitch.
Another option would be to find audio references or ask a more experienced player to demonstrate them and copy the timing by ear.
Once you've got the hang of playing slides in isolation, try putting them to use in a simple melody, both ascending and descending. Playing a descending slide is the same, but reversed. Place the finger next to the hole, then slide it forward.
Finger slides over a wide interval
If you want to play a slide across a wider interval, there are two ways of approaching it:
- First, the slide can span the entire interval between the notes.
- Second, leap to the note above or below and slide from there.

The technique for the second is no different from previously discussed, but there are a few techniques for sliding over the whole interval:
- Slide several fingers at once, practising slowly to get the coordination right.
- Lower your wrists and pivot the fingers up away from the holes.
Though do note that slides across a wide range are extreme effects in most kinds of music and won't be used that often. An example can be found in the opening clarinet wail in "Rhapsody in Blue".
Slides between natural and cross-fingered notes
Sliding between natural and cross-fingered notes, or from one cross-fingered note to another, isn't much more difficult. It just entails sliding multiple fingers at once, timing them so that one finger slides off a hole as another slides onto one.
One way to get started with this is to play slides in a scale that requires cross fingerings, such as F major on a C ocarina. For instance, to slide from A to B flat, slide your left middle finger off its hole, while sliding the right ring finger onto its hole at the same time.
Slides over a wider interval just require sliding a few more fingers onto and off their holes simultaneously. As with everything, practice the finger movements slowly to get a feel for them and then speed them up.
Other variations
The duration of a slide can vary from extremely brief to taking the majority of the duration of a given note. Longer or shorter slides can be practised as discussed previously, but using more subdivisions to provide greater accuracy.

Another variation on slides is to approach the note from the opposite direction. For example, if you are descending from one note to another, you could slide upwards from the note below. Here are two variations in graphical notation, one that rapidly slides into the note and one that's more gradual:

Applying and practising slides
The best advice I can offer for practising slides is to choose one or two of the variations and practice them over the range of your instrument. Then try putting them into music and seeing what you like the sound of.

Then, as that gets easy, experiment with the other options as you become more comfortable playing them.
As always, it's worth listening to performances for reference. There are many examples in Irish flute and fiddle playing, native American flute music, and slide guitar.
Breath slides and note shaping
Slides can also be performed by varying your breath pressure, which changes the pitch and volume simultaneously. To experiment with them, just finger any note and slide into or out of it by slowly raising or lowering your blowing pressure.
Breath slides serve a different function from finger slides, and it's easiest to demonstrate why with an example. If you wanted to perform an ascending breath slide from a note to the note above, you'd have to:
- Start by fingering the lower note in whatever scale you're in.
- Increase your breath pressure until the pitch matches the target note.
- Suddenly change your fingerings to be 'correct' for the target note and cut your blowing pressure.
The transition would sound quite harsh as you'd go from an overblown 'airy' sound to the normal timbre, and there is a good chance the second note would begin sharp.
Personally, I find breath slides most helpful in starting or ending sections of music and shaping notes.
Firstly, breath slides can be an effective way to start notes, as the combined volume and pitch slide provides a fade-in and works particularly well in slower music.
Breath pressure can also be used to shape notes in other ways, changing a note's pitch over its duration. An easy example is an imitation of the pitch bends often used by guitarists, where a note is bent flat or sharp before returning to its original pitch.

Rhythmic breath pulsing can be used to mark the beat. This may be practised similarly to vibrato.

Exactly how you'd use these varies by genre, though, and it's best to listen to and replicate music in a style similar to what you want to play.
However, I would advise against using a breath slide as a final fadeout, as it sounds amateurish in most kinds of music.
True fadeouts are possible on the ocarina, which is addressed next.
Creating 'true' fadeouts and volume dynamics on the ocarina
It is possible to create 'true' fadeouts on the ocarina (lowering the volume without changing the pitch) by varying breath pressure and fingering simultaneously. To get started with it:
- Finger G (assuming C ocarina fingerings) and blow it at the correct pressure.
- Slowly lower your blowing pressure and, at the same time, roll back the high C finger, partly venting the hole.
- If the two actions are perfectly synchronised, they cancel each other out, causing the volume to drop and the pitch to remain constant.
To begin, I'd recommend trying to reduce the volume of the note in small steps:
- Slightly lower the pressure.
- Adjust the fingering to compensate.
- Return to the normal fingering and try to reproduce both actions at once, causing the volume to drop a little, without impacting the pitch.
- Having one of these in muscle memory, try adding another 'step' following it, with a slightly lower pressure and more venting.
Doing this trains you to automatically know how much the finger must move to compensate for the pitch change caused by the change in breath pressure, enabling you to learn how to synchronise them. The technique needs to be practised gradually over a notable period of time.
As was noted in the discussion of vibrato, ocarinas are much more sensitive to pressure changes on the low notes than the high notes. Because of this, these techniques for volume dynamics are easier to control on the higher notes, so I'd recommend practising them there first.
When trying them on other notes, I'd recommend venting the smallest hole available, as it will be easier to control.
Closing notes
Having so many kinds of ornaments and variations of each may feel overwhelming. So, I'd recommend choosing one or two ornaments at first and sticking to playing them in one way until you get comfortable with them.
You can find some examples of these techniques applied to music in Ocarina articulation and ornamentation applied. I'd also recommend looking for audio examples of ornamentations as used by similar instruments in the kinds of music you're interested in playing, and adapt what you're hear to the ocarina.
