Articulation with the fingers: playing cuts and strikes on the ocarina
You're probably already aware that slurred notes sound articulated just because they differ in pitch. But how could you do this if you had to separate two notes of the same pitch without stopping the sound of the ocarina? This is possible by briefly sounding a higher or lower pitch.
The articulations used to achieve this are called 'cut' when the pitch is higher and 'strike' when the pitch is lower. Together, they are called 'fingered articulations' and can be performed using the same techniques on any ocarina. However, to keep things clear, I've assumed C ocarina fingerings for this article. For ocarinas in other keys, the equivalent holes would be used.
Let's jump right in and play some strikes on G:
- Finger a G and blow it at normal pressure as if playing a long tone.
- Lift the right index finger somewhat higher than standard playing position.
- Energetically drive the finger down towards its hole.
- If you completely relax control of the finger just before it contacts the instrument, it will bounce off, producing a very short blip.
Repeating this, you'll be able to perform a series of distinct notes, yet you haven't changed the airflow into the instrument.
Something that you may notice while performing this exercise is that the sound of the strike does not sound like a 'note' in the typical sense, more like a percussive blip or click. This is due to the limits of of human perception: when a note is brief enough, it stops sounding like a note.
This is what you're trying to achieve when playing fingered articulations. They should sound like interruptions. It is much more important that a fingered articulation has a very brief duration, than to have an accurate pitch. When they are performed correctly the pitch should not be audible.
Strikes in music
Strikes can be used to separate notes as in tongued articulation, substituting strikes where you'd use the tongue to separate two note.
For example, you could articulate four G quarter notes by:
- Beginning the first note normally, using the tongue, and slur the following three notes.
- Articulate the following three quarter notes using a strike with any available finger.
That example can be written in notation as follows, with the strikes indicated by placing an arrow above a note. Because a strike is an articulation, it is the start of a given note. They should be performed exactly on the beat, not before or after it.

The notation system I'm using was created by Grey Larsen, and is my preferred way of notating cuts / strikes. There are other notation systems mentioned at the end of the article.
Playing strikes on other notes
Strikes can be played using any open hole on a chamber that's being blown, and possible fingerings depend on the holes that are open. For example, the low D can only be struck using the right pinky, as it is the only raised finger. The other notes offer more options.
I would recommend choosing a finger to strike with for each note, and practising so that the action of performing a strike on that note becomes muscle memory.
For a single chambered ocarina, I tend to use these fingerings:
- D using the right pinky (the only available option).
- E with the right ring finger.
- F with either the right ring or middle finger.
- G with the right index finger.
- I almost always strike everything higher with the right index finger.
Have a go at playing a strike on every note from low D to high F, or the equivalent if your ocarina is in a different key.

Most accidentals can be struck, as can many notes on the higher chambers of multichambered ocarinas but, due to there being variation in the fingering between ocarinas, I won't provide fingerings suggestions here. Try striking with different fingers and see what feels natural and sounds best.
You may find it interesting that the fingerings for strikes are a great deal more flexible on ocarinas than on tubular wind instruments such as the flute and tin whistle. On tubular instruments, only the open hole below the lowest closed hole can be struck.
Playing a descending strike
Strikes can also be performed on a transition from a higher note to a lower one. Doing two things at the same time:
- Firstly, you have to lower one or more fingers to play the desired note.
- At the same time, you have to play a strike such that the striking finger lands on its hole at the exact moment the other fingers do.
The technique used does vary over the range, though. For notes G and higher, the work can be split across both hands. For example, to strike G descending from A, you need to:
- Finger A.
- Descend to G.
- Strike with the right index finger, so that it contacts at the exact moment the G hole is closed.
Any descending interval to or above G can be performed in this way.

If you want to strike a note lower than G, it needs to be done with two or more fingers of the right hand. To descend from G to F, striking F, for example:
- Both the right index and middle fingers are driven down at high speed.
- When the fingers contact, the index finger is held down, while the middle finger is allowed to rebound.
When strikes are played on one hand, the striking finger tends to dwell longer and can cause the strike to be long enough to be heard as a distinct note. Still, the goal is to minimise this as much as possible.
There are many ways of applying strikes in your playing. Here are some examples in an Irish lullaby called 'Suantree' to get you started:

Cuts
A cut is essentially the opposite of a strike, separating two notes by briefly uncovering any closed hole to sound a higher pitch.
Ideally, a cut should be as brief as a strike. To achieve this, the finger movement must be tiny and extremely quick. Although it may appear counterintuitive, it can be developed by practising the movement very slowly at first.
Let's learn how to cut with the left middle finger:
- Hold the ocarina in front of you so you can clearly see what your fingers are doing.
- Very slowly lift the finger a few millimetres above the hole and replace it.
- If needed, your right hand can be used to stop the cutting finger from lifting too high.
After a few minutes to a few days, the action will enter muscle memory, and you'll be able to do it at speed without the finger lifting too high.
In notation, a cut is written like this:

And let's try playing it:
- Finger F, start the first note with the tongue, and keep blowing steadily.
- Articulate the three quarter notes by cutting with the middle finger on the beat.
You may find that at first your cuts are long enough to have an obvious pitch. Try to centre them around the beat, and their duration will reduce with practice.


Also:
- Try to relax. There are some tips in the article How to play the ocarina on finding and reducing tension.
- Aim to practise cuts often. Having your instrument isn't essential; you can do the movement with your fingers on your leg or a table.
Cut fingerings
Any closed hole may be used to play a cut because, as with strikes, the pitch produced does not matter when they are performed well. The goal is just a very brief blip, and what I'd suggest is:
- Cut notes below A using either the left index or middle finger.
- Cut A, B and high C using the left thumb.
- High D, D♯, and E may be cut using the left pinky. However, the effect of this isn't very strong, and I usually use strikes instead.
But feel free to vary this if other fingerings allow you to play shorter cuts.
It's worthwhile practising playing cuts on every note in the same way as previously shown for strikes.

Playing ascending cuts
To play a cut on an ascending interval, the cutting finger is flicked at the same time as the other finger is lifted to play the higher note. This results in a brief sound of a higher pitch.
The following shows an ascending cut on G. Give that a try on your instrument.

Playing descending cuts
Cuts can also be performed on descending note transitions, and doing so is just a matter of playing a cut with one finger while lowering another one. The only caveat is that the fingering used to play the cut must result in a higher pitch than the final fingered note. In some cases, this may require cutting multiple fingers at once.

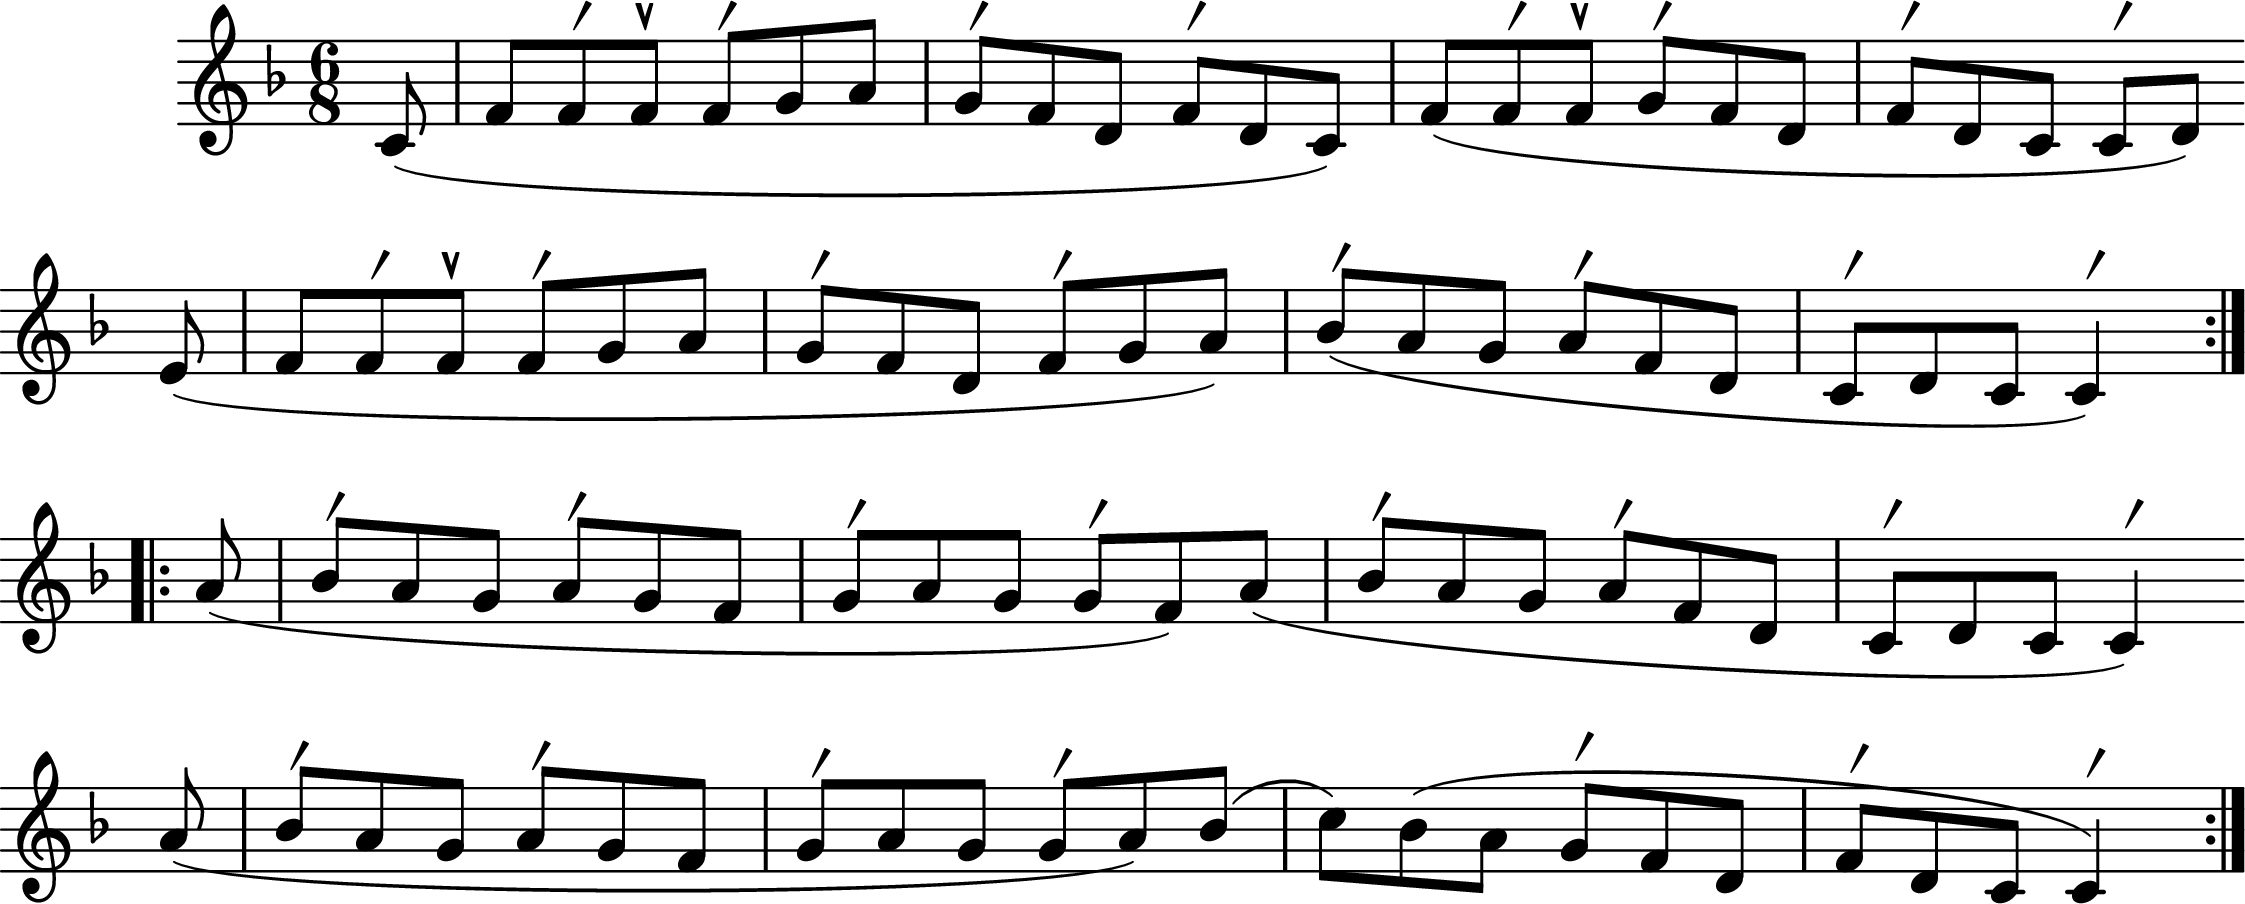
Here are some examples of different kinds of cuts in a Scottish tune called 'Aiken Drum' to try out. Note that when playing multiple cuts sequentially, you may find it easier to use one finger for the first and a different one for the second.

Fingered articulations in practice
For fingered articulations to work correctly, the following points must be obeyed:
- Their duration should not change with tempo.
- They should be as brief as your ability allows.
- They should be precisely on the beat.
These factors could seam rather limiting, but used appropriately, they do have a lot of value:
- Using fingered articulations over a basis of slurring creates music with a distinctly legato 'flowing' sound, without sounding muddled like slurring alone often does.
- Fingered articulations respond faster than tongued articulations, which is helpful when playing at a very high tempo.
There are also quite a few ways of varying the effect created by fingered articulations. While you can't vary the duration of fingered articulations (playing them slowly makes them sound like out-of-tune notes),i t is possible to vary the perceived strength of a cut or strike within a small margin. This is done by as cutting or striking using a larger or smaller hole.
Another option is to combine fingered articulations with tonguing. For example you can tongue a cut. The note starts with the tongue at exactly the same time as the cutting finger is lifted, adding a 'chirp' to the note's attack and emphasising the articulation. This is called a 'tongued cut'
Cuts and strikes would cancel each other out if you did them at the same time, but they can be combined sequentially. In such cases, it is common to alternate cuts and strikes, as it is less tiring to spread the effort between different fingers and, preferably, different hands.
This kind of pattern is called a 'roll', 'crann' or 'birl', depending on the idiom and where in the range it happens. An example can be seen in 'Jim Ward's Jig' below, and they are covered in detail on the page 'Ornamentation: rolls, cranns, and strike cranns'.
Most of the cuts in this example can be played with the left index or middle finger, and the B flat and high C cuts can be played using the left thumb. Note that this tune would more often be played in D, and the transposition here would sound at the original pitch if you used a D ocarina, treating it as a transposing instrument.
The issue of notation
As mentioned earlier, there are several approaches to notating fingered articulations in common use. My preferred notation for them is Grey Larsen's system, as demonstrated in this article. I feel that placing a symbol above the note indicates that the intent is a different kind of articulation, in the same sense as other modifiers like the staccato dot.

However, currently these kinds of articulations are mainly used in the folk music on the British Isles, and these musicians often notate fingered articulations using grace note symbols borrowed from classical tradition. Two different kinds of these exist, and they have well-defined meanings in the classical music tradition, Appoggiatura (a-po-dja-tu-ra), and Acciaccatura (a-cha-ca-tu-ra).
Appoggiaturas are written as small note symbols, and in classical theory, they are generally interpreted as taking half of the duration of the note to which they are attached.

Acciaccaturas are written as a small note symbol with a slash through the stem, and are to be played 'as fast as possible', preceding the note to which they are attached.

From the explanations above, one may assume that an acciaccatura is the same as a fingered articulation, but it isn't quite so simple. Folk musicians do not use these symbols in this way.
Regarding the notation I have seen, the usage of grace note symbols in folk tunes generally doesn't differentiate between acciaccaturas and appoggiaturas, typically using appoggiaturas in all cases. They are to be interpreted as 'play the following note with a cut or strike':
- If the grace note is higher than the following note, it means 'play a cut'.
- A grace note that is lower means 'play a strike'.
How a folk musician would perform these also differs from classical technique. While I am not a classically trained musician, the resources I have looked at demonstrating how to perform acciaccatura always play the note using the correct fingering. For example, a classical violinist would fully depresses the string to the fingerboard.
As demonstrated through this article, cuts and strikes are played using fingerings that aid in achieving a sound of very brief duration. Folk fiddle players commonly perform cuts by pulling a finger rapidly across a string. The finger barely touches the string, and briefly mutes it.
Thus, using grace note symbols to represent fingered articulations is using two symbols to differentiate between three different cases:
- A note, taking half of the parent note's duration.
- A note played as quickly as possible using correct fingering.
- A sound used as an articulation performed with special fingering.
The intended interpretation is only knowable from context and genre.
I will say that I personally dislike using grace notes to represent cuts and strikes, as I find Grey Larsen's system less ambiguous and easier to read. These issues are discussed in more detail in the article Notating fingered articulations.
